2/1(월)
Spring DI 전략 3
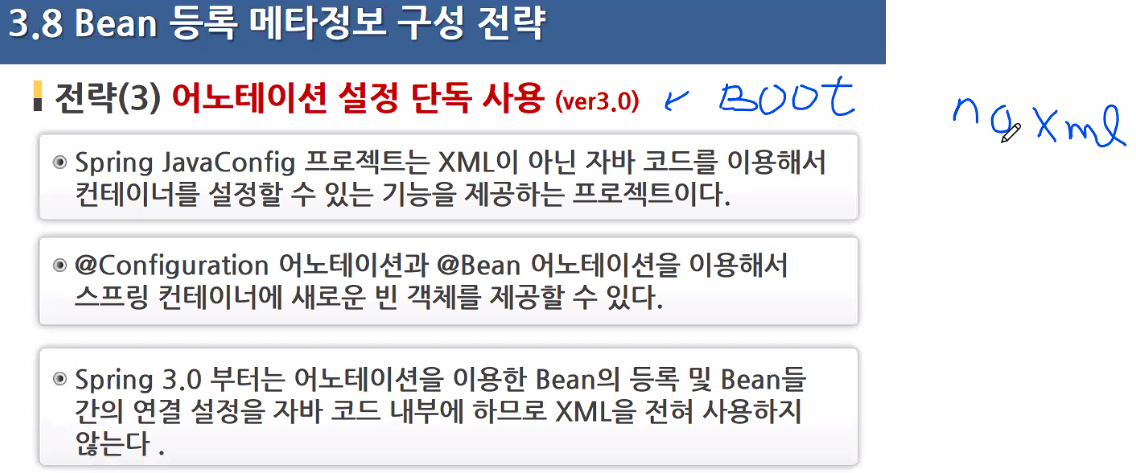
전략3부터는 XML쓰지 않고 자바 코드로 컨테이너 설정 함
Configuration 어노테이션과 @Bean 어노테이션 사용한다.
전략2단계에서 @Component는 클래스 위에 선언했었다.
@Configuration도 비슷한 역할
전략1에서 전략3 사용방법
설정 역할을 하는 자바 클래스 위엔(XML역할을 하는 자바 클래스 위에는)
@Configuration 붙인다.
@Configuration
: 설정 역할을 하는 JAVA 클래스위에 선언된다.
@ComponentScan
: <context:component-scan base-package="" />
: XML에 이렇게 썻던걸 대신하는 어노테이션..
: Spring Bean(Component)를 Auto Scanning 해주는 역할, 설정 클래스 위에 선언
: 설정 클래스 위에 선언
@Bean
: <bean id="" class""/>
: Spring Bean으로 선언해주는 역할
: 메서드 위에 붙는다.
@Configuration
@ComponentScan
@PropertySource
사용법 ( 아래 클래스에 대한 설정파일과 테스트를 해볼 것이다.)
package myspring.di.annot;

import javax.annotation.Resource;

import org.springframework.beans.factory.annotation.Autowired;
import org.springframework.beans.factory.annotation.Qualifier;
import org.springframework.beans.factory.annotation.Value;
import org.springframework.stereotype.Component;

@Component("helloBean")
public class HelloBean {

	// <property name="name value="어노테이션" />
	// 이거랑 똑같은거다.
	@Value("${name}")
	private String name;

	// <property name="printer" ref="stringPrinter" />
//	@Autowired
//	@Qualifier("stringPrinter")
	@Resource(name="${printer}")
	private PrinterBean printer;

	public HelloBean() {
		System.out.println("Hello Default constructor called");
	}

//	@Autowired
//	public HelloBean(@Value("생성자어노테이션")String name,
//					 @Qualifier("stringPrinter")PrinterBean printer) {
//		this.name = name;
//		this.printer = printer;
//	}

	public HelloBean(String name, PrinterBean printer) {
		this.name = name;
		this.printer = printer;
	}

	public void setName(String name) {
		System.out.println("Hello setName() called" + name);
		this.name = name;
	}
	public void setPrinter(PrinterBean printer) {
		System.out.println("Hello setPrinter() called" + printer.getClass().getName());
		this.printer = printer;
	}

	public String sayHello() {
		return "Hello" + this.name;
	}

	public void print() {
		this.printer.print(sayHello());
	}

}
configuration package생성 후 configuration class생성
이후 아래와 같이 만들어준다.
package myspring.di.annot.config;

import org.springframework.context.annotation.ComponentScan;
import org.springframework.context.annotation.Configuration;
import org.springframework.context.annotation.PropertySource;

@Configuration

//<!--  DI전략2의 Component Auto Scanning 설정 -->
//<context:component-scan base-package="myspring.di.annot" />
@ComponentScan(basePackages = {"myspring.di.annot"})

//<!-- Properties 파일 만들것이다. -->
//<context:property-placeholder location="classpath:config/values.properties"/>
@PropertySource("classpath:config/values.properties")
public class HelloBeanConfig {


}
전략3에서 Testcase 만들 때, XML이 없기 때문에
@ContextConfiguration()에서 Config Class를 알려줘야한다.
그 후 설정XML을 사용할 때 생성됬던 Spring 컨테이너 역할을 하는 클래스(GenericXmlApplicationContext)를 사용했었다. 그러나 전략3에서는
설정 클래스 사용할 때 AnnotationConfigApplicationContext 컨테이너 클래스를 사용해야 한다.
package myspring.di.annot.config.test;

import org.junit.Test;
import org.junit.runner.RunWith;
import org.springframework.beans.factory.annotation.Autowired;
import org.springframework.test.context.ContextConfiguration;
import org.springframework.test.context.junit4.SpringJUnit4ClassRunner;
import org.springframework.test.context.support.AnnotationConfigContextLoader;

import myspring.di.annot.HelloBean;
import myspring.di.annot.config.HelloBeanConfig;

@RunWith(SpringJUnit4ClassRunner.class)
@ContextConfiguration(classes = HelloBeanConfig.class, loader = AnnotationConfigContextLoader.class )
public class HelloBeanConfigTest {

	@Autowired
	HelloBean hello;


	@Test
	public void config1() {
		System.out.println(hello.sayHello());

	}

}
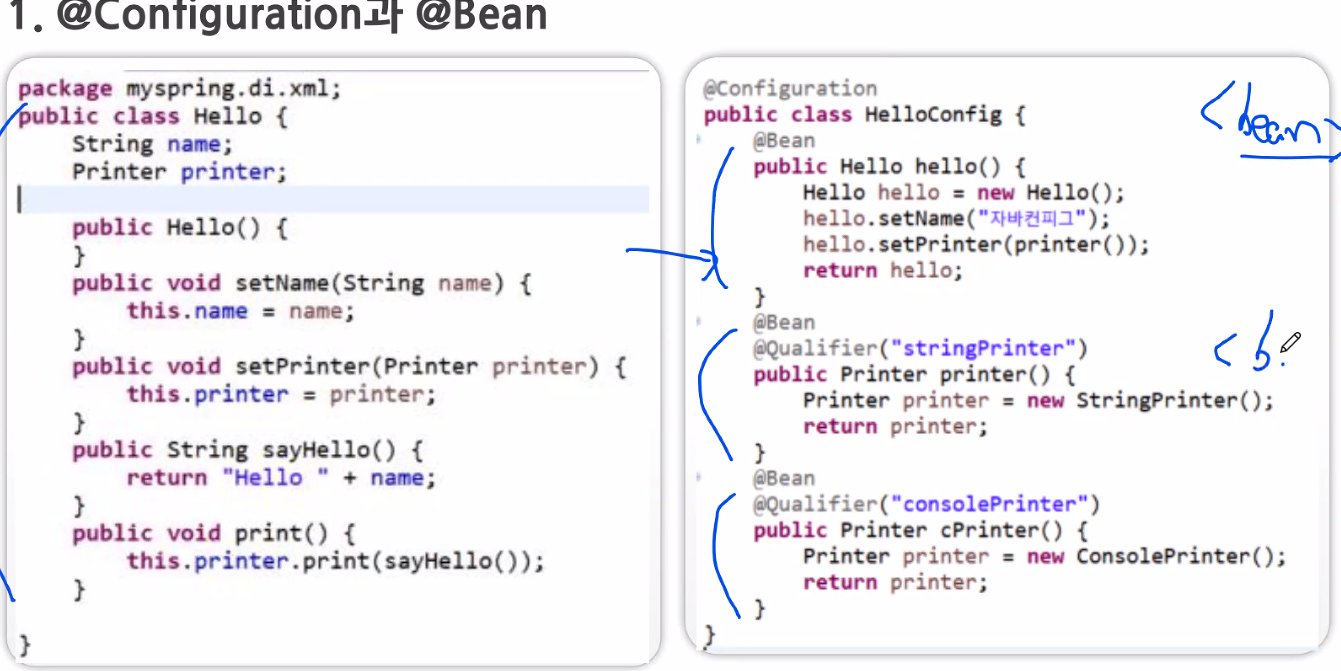
@Bean사용법
@Bean은 @Component와 같은 역할을 한다.
아래 클래스에 대한 Config파일과 테스트를 진행할것이다.
package myspring.di.xml;

import java.util.Map;

public class Hello {
	private String name;
	private Printer printer;
	private Map<Integer,String> myMaps;

	public Hello() {
		System.out.println("Hello Default constructor called");
	}

	public Hello(String name, Printer printer) {
		this.name = name;
		this.printer = printer;
	}

	public void setName(String name) {
		System.out.println("Hello setName() called" + name);
		this.name = name;
	}
	public void setPrinter(Printer printer) {
		System.out.println("Hello setPrinter() called" + printer.getClass().getName());
		this.printer = printer;
	}

	public Map<Integer,String> getMyMaps() {
		return myMaps;
	}

	public void setMyMaps(Map<Integer, String> myMaps) {
		this.myMaps = myMaps;
	}

	public String sayHello() {
		return "Hello" + this.name;
	}

	public void print() {
		this.printer.print(sayHello());
	}

}
또한 아래 XML파일 설정값에 대한 것이다.
<!-- Hello Bean 설정 -->
	<!--
		scope종류
		1. singleton (default) : 객체 생성 하나만하겠다.
		2. prototype : 객체 생성 항상 한다.
		3. request, session : 웹에서 사용하는 스코프, session이 request 보다 범위가 넓음.
	 -->
	<bean id="hello" class="myspring.di.xml.Hello" scope="singleton">
		<!-- Setter Injection 설정 -->
		<property name="name" value="스프링이다." />
		<property name="printer" ref="strPrinter" />
		<property name="myMaps">
			<map>
				<entry key="100" value="스프링클라우드" />
				<entry key="200" value="스프링배치" />
				<entry key="300" value="스프링쿠버네티스" />
			</map>
		</property>
	</bean>
package 생성하고, config 파일생성한다.
Property 파일에 있는 값들을 주입한다.
그러니까 여기 보면... Printer stringPrinter(){} 메서드,
Printer consolePrinter() 메서드위에 @Bean이 붙은 것을 볼 수 있다.
package myspring.di.xml.config;

import javax.annotation.Resource;

import org.springframework.beans.factory.annotation.Value;
import org.springframework.context.annotation.Bean;
import org.springframework.context.annotation.Configuration;
import org.springframework.context.annotation.PropertySource;
import org.springframework.context.annotation.Scope;

import myspring.di.xml.ConsolePrinter;
import myspring.di.xml.Hello;
import myspring.di.xml.Printer;
import myspring.di.xml.StringPrinter;

@Configuration
//<!-- Properties 파일 만들것이다. -->
//<context:property-placeholder location="classpath:config/values.properties"/>
@PropertySource("classpath:config/values.properties")
public class HelloConfig {
	// Bean의 ID는 메서드이름이다.
	@Value("${name}")
	String name;

	@Resource(name = "${printer}")
	Printer printer;

	@Bean
	@Scope(value = "singleton")
	public Hello hello(){
		Hello hello= new Hello();
		hello.setName(name);
		//hello.setPrinter(stringPrinter());
		hello.setPrinter(printer);
		return hello;
	}

	@Bean
	public Printer stringPrinter() {
		Printer printer = new StringPrinter();
		return printer;
	}

	@Bean
	public Printer consolePrinter() {
		Printer printer = new ConsolePrinter();
		return printer;
	}


}
이걸 이제 테스트쪽으로 가보면
@Autowired
	Hello hello;

	@Autowired
	@Qualifier("hello")
	Hello hello2;

	@Autowired
	@Qualifier("stringPrinter")
	Printer printer;

	@Test
	public void consoleConfig() {
		System.out.println(hello.sayHello());
		hello.print();
	}

	@Test @Ignore
	public void config(){
		System.out.println(hello == hello2);
		System.out.println(hello.sayHello());
		hello.print();
		System.out.println(printer.toString());
	}
'Dev > [Java]' 카테고리의 다른 글
| [Spring] 7. Mapper 써보기 (0) | 2021.02.01 |
|---|---|
| [Spring] 5. Database Connection Pool (DBCP)써보기, MyBatis Spring (0) | 2021.02.01 |
| [JAVA공부] 이클립스 단축키 정리 (0) | 2021.01.30 |
| [Spring] 2. Constructor Injection, DI전략2 어노테이션 써보기 (0) | 2021.01.29 |
| [Spring] 1. 라이브러리와 프레임워크의 차이점? DI전략1 (0) | 2021.01.29 |


